
Requirements
| Minimum | Tested up to | |
|---|---|---|
| WordPress | 6.7 | 7.1 |
| PHP | 7.4 | – |
| WooCommerce | 9.6 | 11.2 |
Install
- Download
candy-shop-<version>.zipfrom your WPRuby account. Don’t unzip it. - In WordPress, go to Appearance → Themes → Add New Theme → Upload Theme.
- Choose the ZIP, click Install Now, then Activate.
- Install and activate WooCommerce if it isn’t active yet.
The setup checklist
Appearance → Candy Shop is the theme’s own screen. It starts with a checklist that ticks itself off as your store takes shape:
| Step | Done when |
|---|---|
| Activate WooCommerce | WooCommerce is active |
| Add your sweets | You have at least one published product |
| Create Flavor and Dietary attributes | A product attribute named Flavor or Dietary exists |
| Add food information | At least one product has ingredients or an allergen statement |
| Add your logo | The site has a logo |
| Turn on a payment method | At least one payment method is enabled |
| Set up shipping | A shipping zone has a method every order can use (a free-shipping minimum alone blocks smaller orders) |
| Activate your licence | Optional: your licence is active |
Each step has a button that takes you to the right screen.
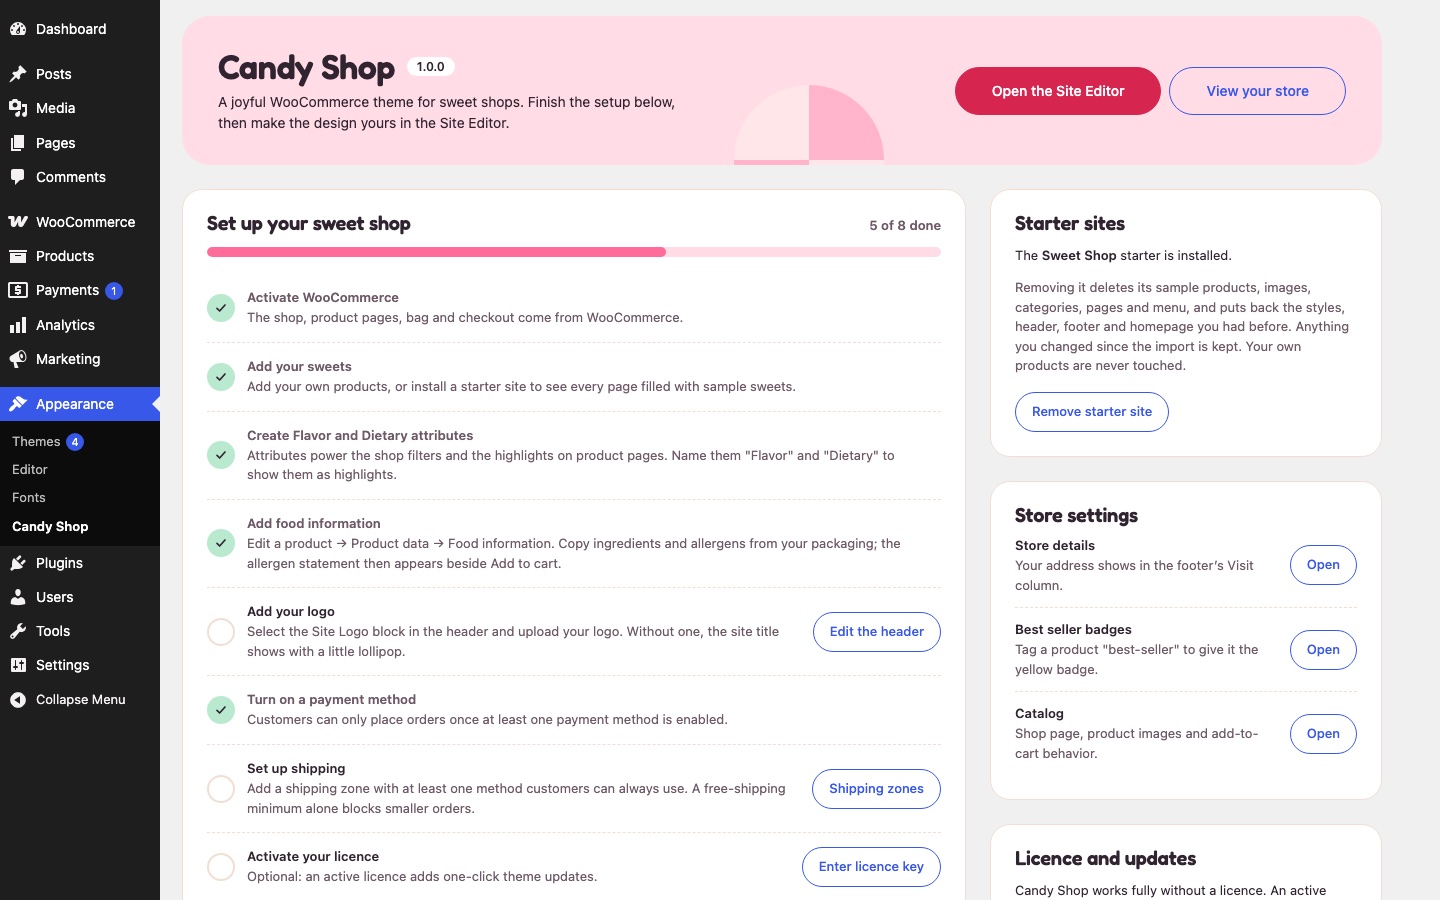
Below the checklist are shortcuts into the Site Editor (colors and fonts, homepage, header, footer, menus, templates and patterns), a preview of every style variation, links to the store settings the theme reads, the starter sites, the licence and help links.
Customizations that survive updates
Changes you make in the Site Editor are saved in your site’s database, so theme updates don’t overwrite them. For custom CSS, templates, patterns or PHP in files, use the child theme.