
Rates and labels are based on parcels, so the plugin packs the order’s items into parcels first. Accurate product weights and dimensions give accurate rates.
1. Choose a packing method
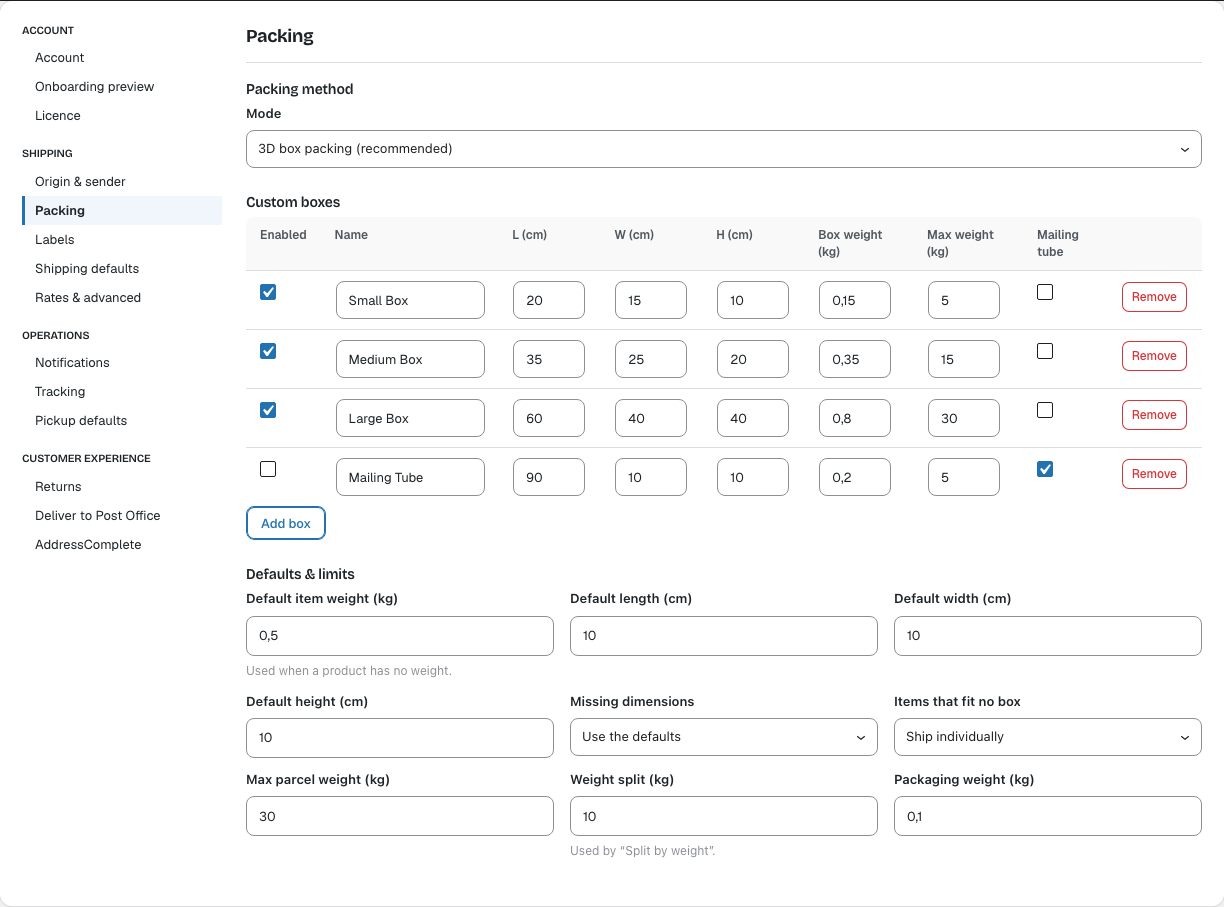
Go to Canada Post → Settings → Packing and choose the Mode:
- 3D box packing (recommended): fits items into your boxes in three dimensions, rotating them where allowed, and picks the smallest box that holds everything.
- Fit into custom boxes (volume): fills your boxes by volume and keeps items upright.
- Everything in one parcel, Each item ships individually or Split by weight.
2. Add your boxes
Under Custom boxes enter the inside length, width and height in centimetres, the empty box weight and the maximum weight it can hold. Tick Mailing tube for tubes. Click Add box for more boxes and untick Enabled to stop using one.
3. Defaults for products without data
Under Defaults & limits set the weight and dimensions used when a product has none, what happens when an item fits in no box, and the maximum parcel weight.
4. Product shipping options
Edit a product and open Product data → Shipping. Besides WooCommerce’s weight and dimensions, the Canada Post (PRO) section adds:
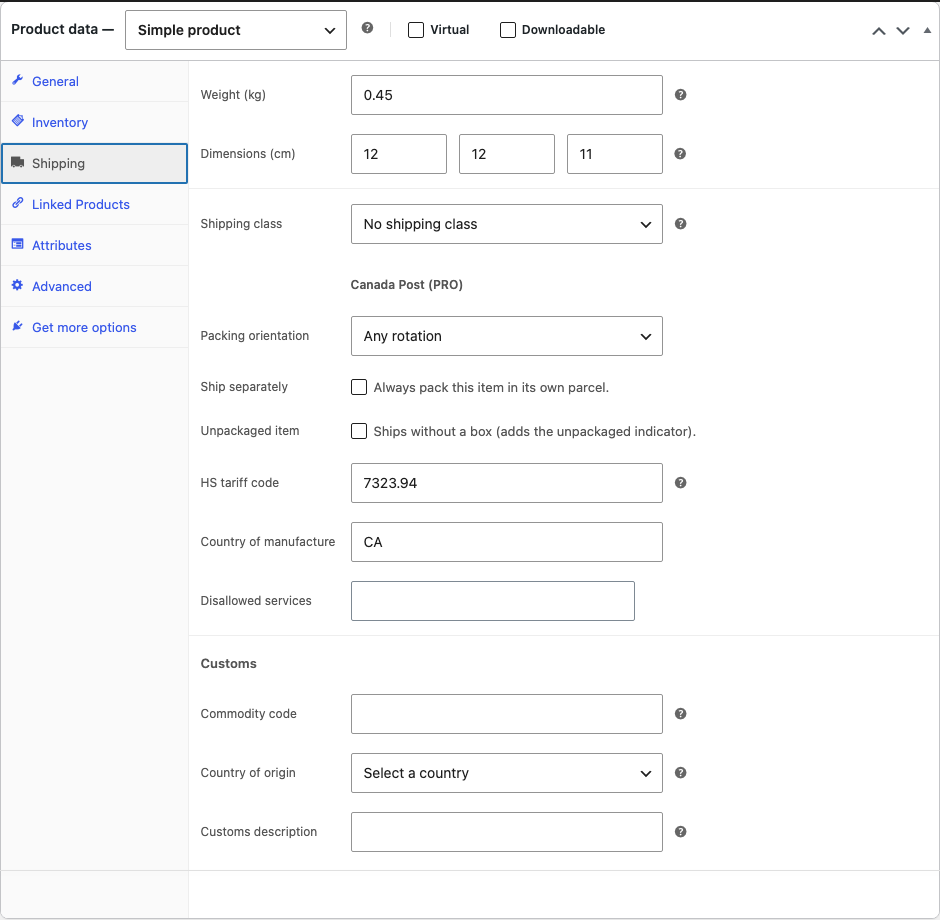
- Packing orientation: any rotation, keep upright, or do not rotate.
- Ship separately: always pack this item in its own parcel.
- Unpackaged item: the item ships without a box.
- HS tariff code and Country of manufacture: pre-fill the customs declaration for international shipments.
- Disallowed services: services this product must never ship with.
Variations use the settings of their parent product.
Note: You can always adjust the parcels on an individual shipment in the Label printer: change the weight or box, Add parcel, or Repack items with another method.