
Canada Post rates are added per WooCommerce shipping zone, so you can offer different services and prices in different regions.
1. Add the shipping method
Go to WooCommerce → Settings → Shipping, open a zone (or create one, for example Canada, United States and Rest of the world), click Add shipping method and choose Canada Post. Then click Edit next to it to open its settings page.
2. Choose the services
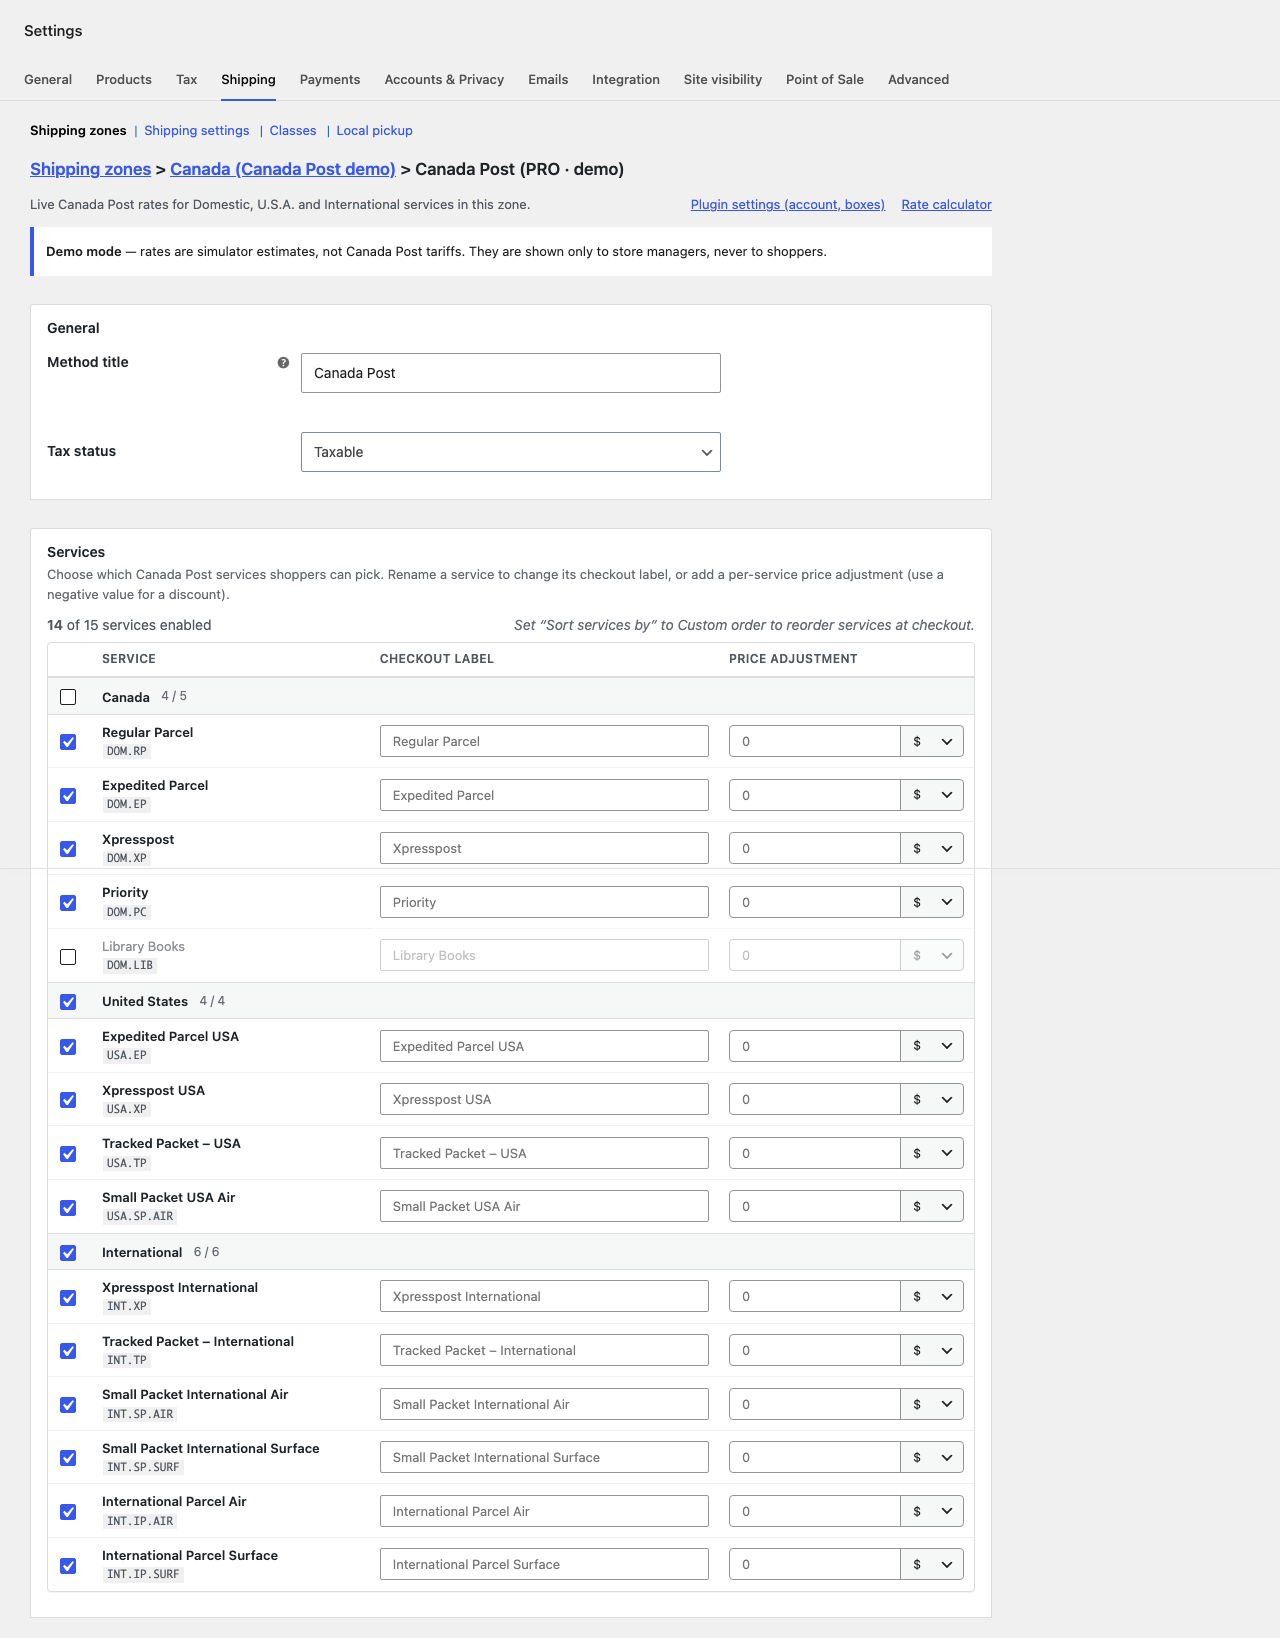
- Services are grouped by destination: Canada, United States and International. Use the checkbox in a group heading to turn the whole group on or off.
- Checkout label: rename a service, for example “Expedited (2–5 days)”.
- Price adjustment: add a fixed amount or a percentage to a service. Use a negative value for a discount.
3. Rate quoting, price adjustments and free shipping
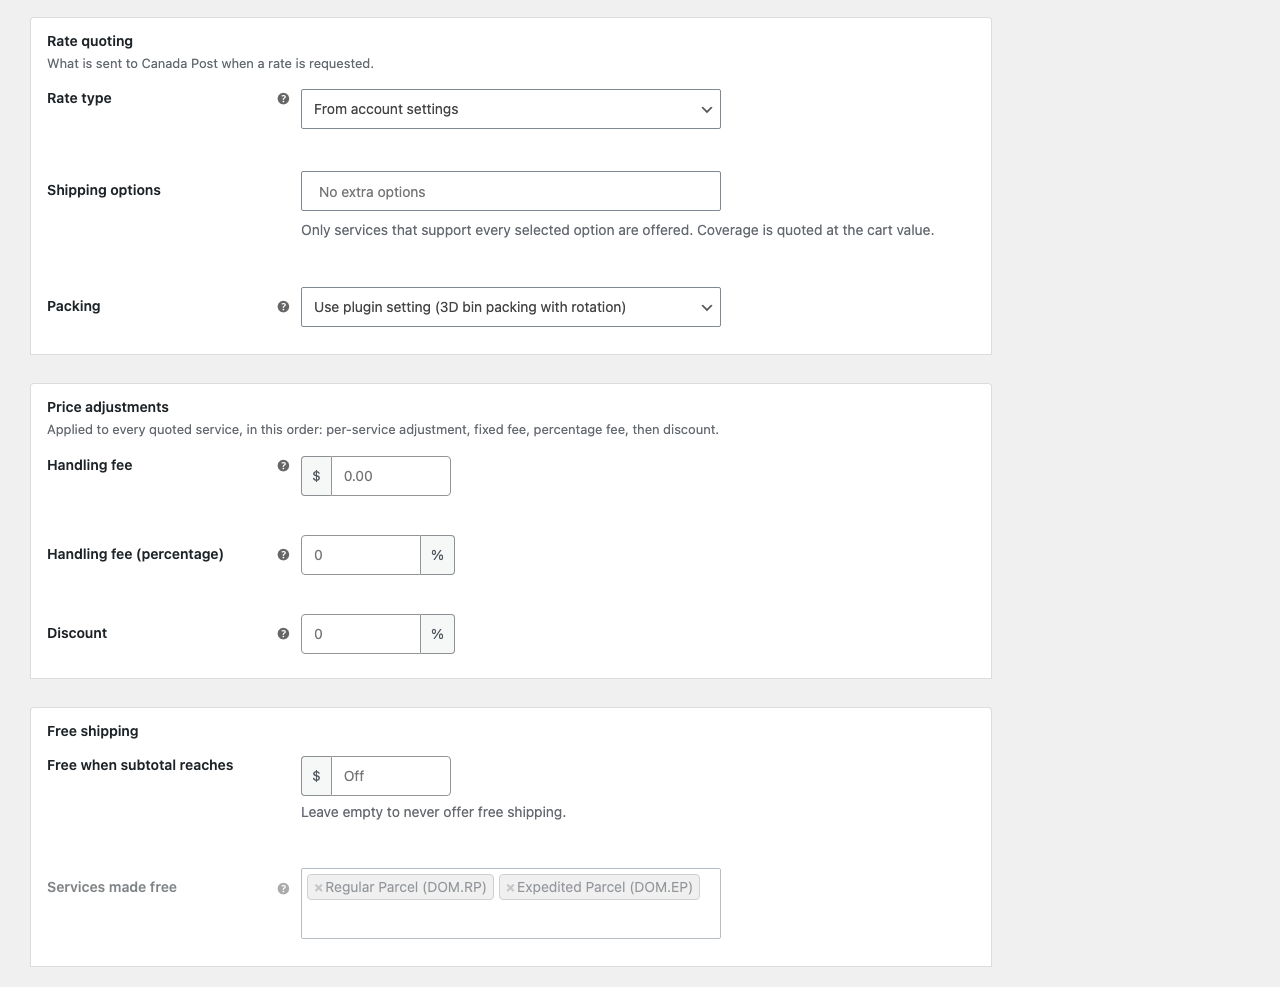
- Rate type: your contract (business) rates, retail (counter) rates, or whatever your account settings say.
- Shipping options: quote options such as Signature or Coverage. Only services that support every selected option are offered; Coverage is quoted at the cart value.
- Packing: use the plugin’s packing setting or choose another method for this zone.
- Handling fee, Handling fee (percentage) and Discount are applied to every service, in that order.
- Free when subtotal reaches: the selected Services made free cost nothing once the cart subtotal reaches this amount.
4. Checkout display and restrictions
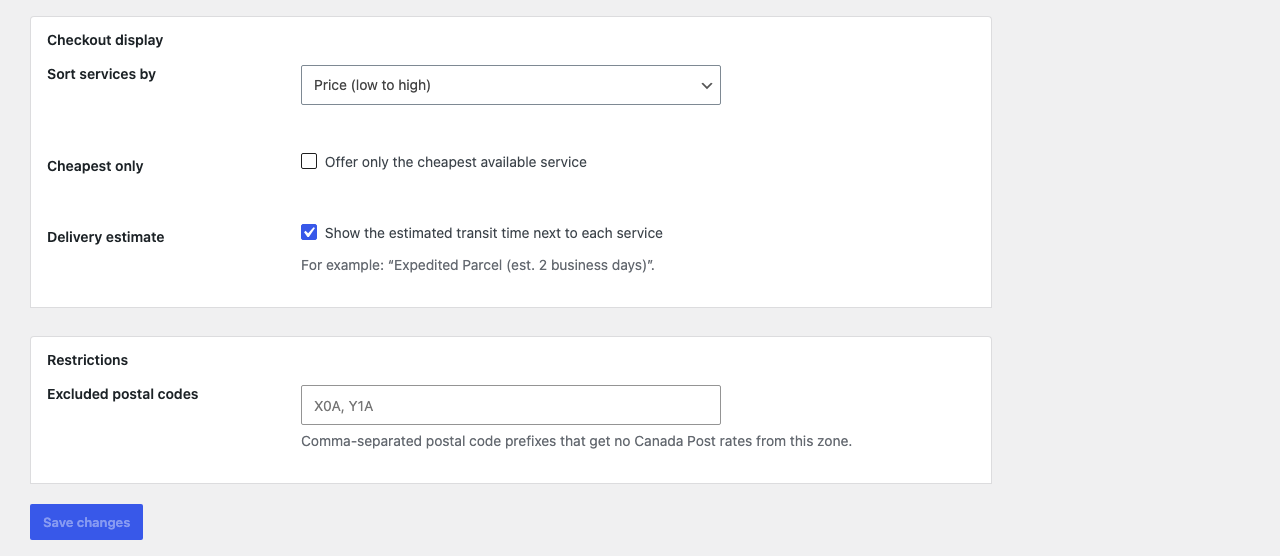
- Sort services by price, speed or your own order. With Custom order, an Order column appears in the services table.
- Cheapest only shows a single rate.
- Delivery estimate adds the transit time to each service, for example “Expedited Parcel (est. 2 business days)”.
- Excluded postal codes: comma-separated postal code prefixes that get no Canada Post rates from this zone.
Click Save changes.
Note: In Demo mode and Test API mode, rates are only shown to store managers. Log in as an administrator to preview them at checkout. See Demo mode, Test API mode and going live.