
WooCommerce Canada Post Extension PRO adds Canada Post rates at checkout and lets you create shipments, print labels, close out manifests, track parcels, issue returns and book pickups without leaving WordPress. You need WordPress 6.4 or newer, WooCommerce 8.5 or newer and PHP 8.1 or newer.
1. Install the plugin
- Download woocommerce-canada-post-extension-pro.zip from your WPRuby account (Purchase history).
- In WordPress go to Plugins → Add New Plugin → Upload Plugin, choose the ZIP file and click Install Now.
- Click Activate. The plugin creates its tables and opens the Canada Post dashboard.
2. Find your way around
Everything lives under the Canada Post menu in the WordPress sidebar: Dashboard, Shipments, Bulk Shipping, Manifests, Tracking, Returns, Pickups, Rate Calculator, Post Offices, Settings and API Diagnostics.
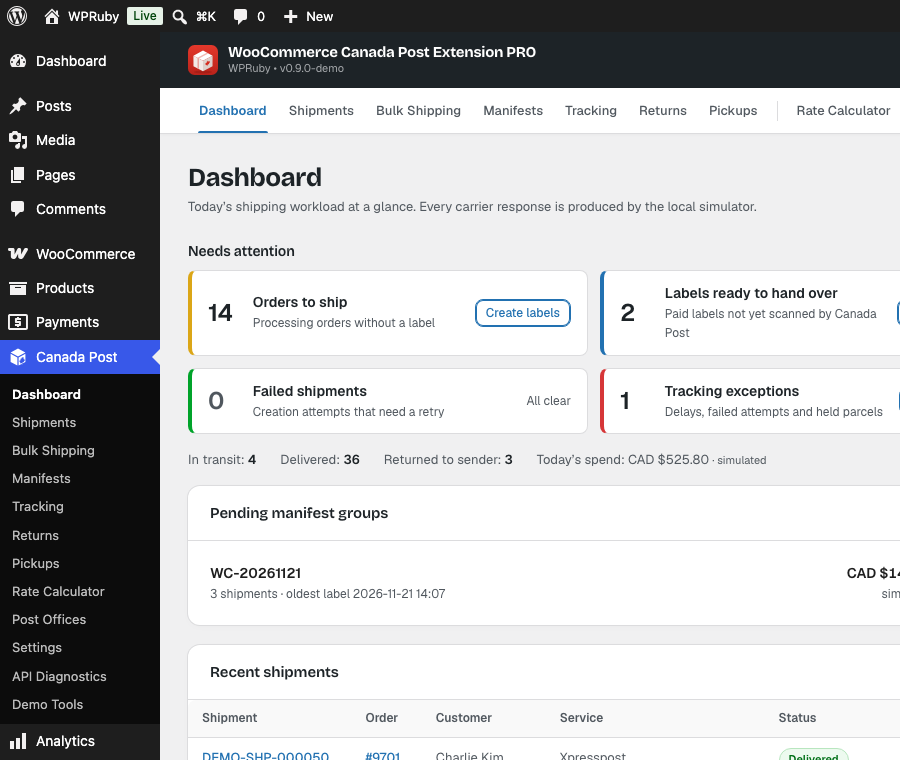
The header shows the operating mode (Demo mode or Test API) and, once you have connected your account, the connection status with a Test connection button.
3. Next steps
- Activate your licence to receive updates and support.
- Read about Demo mode and Test API mode, then connect your Canada Post account.
- Fill in the settings (sender address first), then add Canada Post to a shipping zone.
- Set up your boxes and product shipping options.
Note: Want to look around first? Open the Dashboard and click Generate demo data. It creates sample products, orders and shipments in Demo mode so you can try every screen. Demo Tools → Reset removes them again.