WooCommerce checkout asks for a street, city, postcode, and country. It does not help the customer enter those values correctly. A missing house number, a postcode from another country, or a street name with a typo will usually still pass, because the fields are not empty.
WooCommerce address autocomplete changes that moment. As the customer types in address line 1, they see real postal suggestions. Selecting one fills street, city, state, postcode, and country in a single step. Fewer keystrokes, fewer mismatches, fewer parcels that cannot be labelled.
This guide explains how address autocomplete works at WooCommerce checkout, which providers to use, how it differs from address validation, and how to set it up with Address Guard Pro.
What WooCommerce address autocomplete is
Address autocomplete is a checkout helper, not a carrier check.
The customer starts typing a street or building. After a few characters, a dropdown of matching addresses appears. Choosing a suggestion populates the rest of the address form from postal data:
- Address line 1 (street and house number)
- Address line 2 when the provider returns a unit, apartment, or building name
- City
- State or region
- Postcode
- Country
The customer can still type freely. Autocomplete does not replace the form. It reduces the chance that the typed address is incomplete or internally inconsistent.
It is not the same as:
- Making address fields required (WooCommerce already does that)
- Confirming that a carrier can deliver there (that is address validation)
- Blocking PO boxes or parcel lockers (that is a fulfilment rule)
Most stores that ship physical products need autocomplete and validation together. Autocomplete stops the typo. Validation checks the result before payment.
Why typed checkout addresses fail more often than they look
A checkout address that “looks fine” can still fail when you buy a shipping label.
Typical typing mistakes:
- Street with no house or building number
- Postcode that does not belong to the selected country
- City copied from billing, street copied from memory
- Apartment or unit left off address line 2
- Country left on the store default while the customer types a foreign street
- Mobile autocorrect changing a street name
These are ordinary errors. They are more common on phones, where the customer is switching between a card, an email, and a small form. Autocomplete is especially useful there: one tap fills six fields that would otherwise be typed separately.
The cost of getting this wrong is not only a return-to-sender fee. Fulfilment pauses the order, support emails the customer, delivery dates slip, and express orders miss the cutoff. Catching the mistake while the customer is still on checkout is cheaper than reconstructing the address after payment.
How address autocomplete works at WooCommerce checkout
A working WooCommerce address autocomplete flow has four parts.
- The customer types in address line 1. Search does not run on every keystroke from character one. A minimum character threshold (commonly three) keeps suggestions relevant and keeps API usage down.
- Suggestions are requested from a provider. Google Places, Mapbox Address Autofill, Loqate Address Capture, or Smarty Autocomplete return a short list of matches. The request is biased to the checkout country when the customer has already chosen one.
- The customer selects a suggestion. Some providers return a complete address immediately. Others return a place ID first, then a second request fetches street, city, postcode, and country.
- The checkout form is filled. Country is applied first when it changed, then street, city, state, and postcode. On classic checkout, WooCommerce refreshes the form so the correct state field appears. On Checkout Blocks, the cart store is updated so shipping methods can recalculate.
If the customer ignores the dropdown and types the rest by hand, checkout still works. Autocomplete is assistance, not a gate. Pair it with validation if you need to stop unverified addresses.
WooCommerce does not include address autocomplete
WooCommerce can require country, street, city, state, and postcode. It can offer shipping zones based on those fields. It cannot suggest real addresses, and it cannot fill city and postcode from a selected street.
Browser autofill is also not the same feature. Browser autofill replays an address the customer saved earlier. It does not look up postal data, and it will happily fill a stale or incomplete address.
So you have three practical options:
| Approach | Best for | Drawbacks |
|---|---|---|
| Custom Google Places (or similar) code | Agencies with a maintenance budget | You must support Checkout Blocks and classic checkout, map address components, handle country changes, and own API errors |
| A checkout field plugin with a Places widget | Stores that only need suggestions | Often billing-only or classic-checkout-only; usually no validation, rules, or order record |
| Address autocomplete plus validation in one plugin | Stores that ship physical products | You still need your own provider credentials |
Custom code is a reasonable choice for one tightly specified checkout. It becomes expensive once you need both checkout types, shipping and billing independently, country-biased suggestions, and a fallback when the API fails.
Choose an autocomplete provider
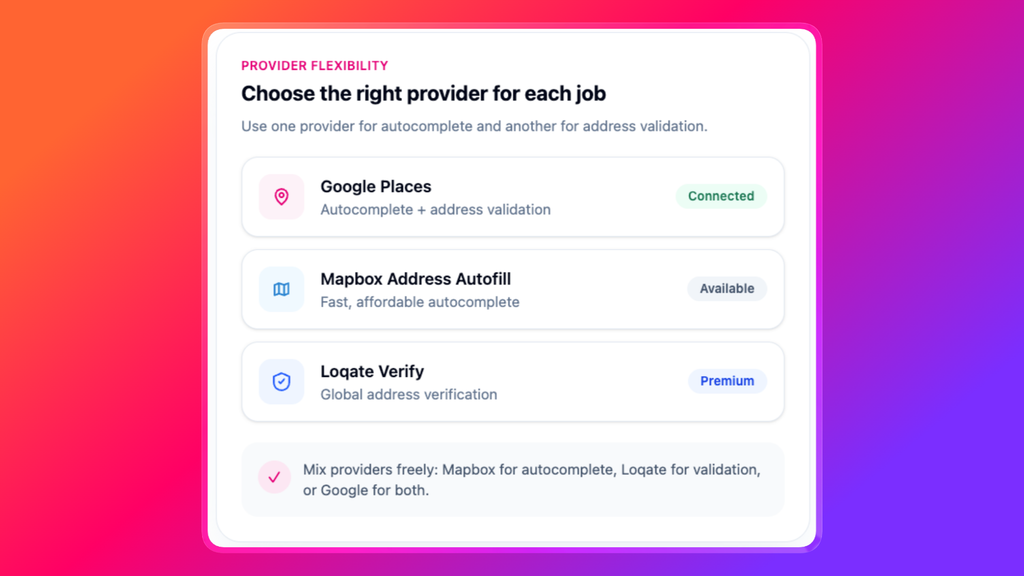
Address Guard Pro does not bundle provider usage. You connect your own credentials and keep control of API billing. Autocomplete and validation are separate choices, so you can mix providers.
| Provider | Role at checkout | Typical fit |
|---|---|---|
| Google Places | Suggests addresses, then fetches place details | Broad international coverage; pair with Google Address Validation |
| Mapbox Address Autofill | Address search and autocomplete | Strong map/search UX; use a dedicated validation provider for deliverability |
| Loqate Address Capture | Structured capture, including nested results (building, then unit) | High-volume or multi-country catalogues that need capture plus verify |
| Smarty Autocomplete | US and international autocomplete | Stores already using Smarty for US or international validation |
A common setup is Google Places for autocomplete and Google Address Validation for verification. Mapbox plus Loqate or Smarty is a good mix when you want search-quality suggestions and postal-grade validation from different vendors.
Limit autocomplete countries to the destinations you actually ship to. If the customer has already chosen a checkout country, that country should win over your store default. Otherwise suggestions from another market will fill the form, then shipping zones and tax will look wrong.
Country context should follow this order:
- The country the customer selected at checkout
- The countries you configured as autocomplete preferences
- The provider’s own region setting
- No restriction (provider defaults)
Leaving the country list empty is fine while you test. Tighten it before you send paid traffic to checkout.
Set up WooCommerce address autocomplete with Address Guard Pro
Address Guard Pro adds address autocomplete to both Checkout Blocks and classic [woocommerce_checkout]. Suggestions attach to address line 1. Selecting one fills the rest of the address and keeps WooCommerce in sync.
You use your own Google, Mapbox, Loqate, or Smarty credentials.
Step 1: Connect an autocomplete provider
Go to WooCommerce → Address Guard → Providers.
- Choose an Autocomplete provider (Google Places, Mapbox Address Autofill, Loqate Address Capture, or Smarty Autocomplete).
- Enter the API credentials for that provider.
- Optionally set Autocomplete countries to the markets you ship to.
- Click Test autocomplete provider.
Do not enable autocomplete on checkout until the test succeeds. A failed test usually means a missing key, a key restricted to the wrong APIs, or a billing account that has not enabled the Places or Search product.
If you also want verification before payment, connect a Validation provider on the same screen. Autocomplete can go live on its own. Validation is the second layer.
Step 2: Enable autocomplete on checkout
Go to WooCommerce → Address Guard → Checkout.
Recommended starting settings for a store that ships physical products:
- Enable address autocomplete: On
- Apply to shipping address: On
- Apply to billing address: Off, unless invoices or tax IDs depend on a precise billing street
- Minimum characters before search: 3
Shipping is the address that must be deliverable. Billing can stay as typed for most stores. If you enable both, test them independently: a customer may bill to a PO box and ship to a street address.
The minimum character setting controls when search starts. Three is a sensible default. Lower it only if your customers often search by very short building names. Higher values reduce API calls but make the dropdown feel late.
Step 3: Confirm the checkout type your store uses
Address Guard Pro supports:
- Checkout Blocks (the current WooCommerce checkout)
- Classic shortcode checkout (
[woocommerce_checkout])
The Checkout screen shows which type it detected.
On classic checkout, autocomplete attaches to the standard WooCommerce address fields and re-initializes after checkout updates (for example after a country change).
On Checkout Blocks, autocomplete attaches by watching the address fields as they render. Selecting a suggestion updates the Blocks cart store so shipping methods and totals can refresh. Some block themes need extra CSS if the dropdown is clipped by an overflow rule. Check that on a phone-width viewport, not only on desktop.
Step 4: Pair autocomplete with validation and rules
Autocomplete reduces mistakes. It does not stop a customer who types a fake street and ignores the dropdown.
For a complete checkout address flow:
- Autocomplete helps the customer enter the address.
- Validation checks the address against postal data.
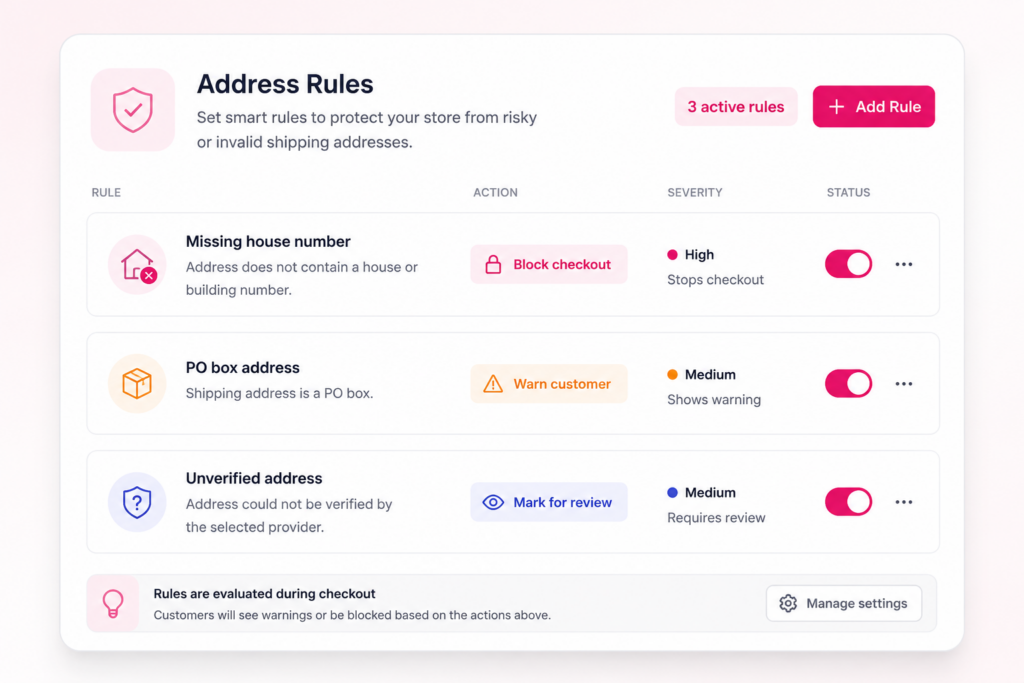
- Rules encode store policy: missing house numbers, PO boxes, postcode/country mismatches.
A practical first policy:
- Autocomplete on the shipping address
- Validation on the shipping address
- Checkout action: Warn customer
- Allow unverified addresses until you have reviewed a week of real orders
- Block missing house numbers and invalid postcode/country combinations once those rules are tested
How to turn that into a live workflow is covered in How to Validate Addresses Before WooCommerce Checkout. If your carriers cannot deliver to PO boxes or parcel lockers, add those restrictions separately: How to Block PO Boxes and Parcel Lockers in WooCommerce.
Step 5: Test the live checkout, not only the API
The provider test confirms credentials. It does not confirm that your theme, checkout type, and country field work together.
On a staging site or in an incognito window, place a test order and check:
- Typing three or more characters in shipping address line 1 shows suggestions
- Keyboard navigation (arrow keys, Enter, Escape) works
- Selecting a suggestion fills street, city, state, postcode, and country
- Changing country first biases the next suggestions to that country
- Shipping methods update after the postcode is filled
- Billing is left alone if you disabled billing autocomplete
- A customer can still type an address without picking a suggestion
- The same flow works on a phone-width screen
Then enter a known-good address with the house number removed, and a postcode from another country, to confirm validation and rules still fire after autocomplete is on.
Shipping address vs billing address
Apply autocomplete where a mistake is expensive.
Shipping address: turn it on. This is the address on the label. A wrong street or postcode here becomes a failed delivery.
Billing address: leave it off unless you have a reason. Card networks and tax engines are usually more tolerant of a slightly messy billing street than carriers are of a messy shipping street. A customer may also bill to a PO box, a registered office, or a finance team address that should not be “corrected” into a street.
If shipping and billing are the same, filling shipping is enough. If they differ, keep the two forms independent so a shipping suggestion cannot overwrite a billing address the customer meant to keep.
Autocomplete vs validation vs local rules
Stores often install autocomplete and expect failed deliveries to disappear. That only happens if the customer uses the suggestions and the selected address is deliverable.
| Layer | What it does | What it does not do |
|---|---|---|
| Autocomplete | Suggests and fills a structured address while the customer types | Force the customer to pick a suggestion; prove the address is deliverable |
| Provider validation | Verifies, standardizes, or flags the address before the order is placed | Encode store policy such as “no PO boxes on express” |
| Local rules | Block or warn on missing house numbers, PO boxes, lockers, postcode mismatches | Confirm that a building exists |
Use all three when you ship physical products. Use autocomplete alone only if your main problem is slow, error-prone form filling and you are willing to catch remaining issues in fulfilment.
A setup that works for most WooCommerce stores
If you want a default configuration that improves checkout without surprising customers:
- Connect Google Places for autocomplete, or Mapbox if you already have a Mapbox token.
- Limit autocomplete countries to the countries in your shipping zones.
- Enable autocomplete on the shipping address only.
- Set minimum characters to 3.
- Connect a validation provider (Google Address Validation, Loqate Address Verify, or Smarty) and start with Warn customer.
- Test on the checkout type your store actually uses, including a mobile viewport.
- After a week of orders, add blocking rules for the mistakes that consistently delay dispatch.
The goal is not to make customers pick from a dropdown. It is to make the correct address the easiest thing to enter, then catch the rest before payment.
Common WooCommerce address autocomplete questions
Does this work with Checkout Blocks?
Yes. Address Guard Pro supports Checkout Blocks and classic shortcode checkout. Confirm the detected checkout type under WooCommerce → Address Guard → Checkout, then test both if you switch templates.
Will customers be forced to use a suggestion?
No. They can ignore the dropdown and type. If you need to reject unverified or incomplete addresses, enable validation and rules.
Do I need Google specifically?
No. Google Places is a strong default for international stores. Mapbox, Loqate, and Smarty are first-class alternatives. Choose the network you already pay for, or the one that covers your shipping countries best.
Does autocomplete replace address validation?
No. Autocomplete helps data entry. Validation checks deliverability. You can run autocomplete without validation, but you should not treat suggestions as a guarantee that the carrier will accept the address.
What about API cost?
You pay the provider directly. Address Guard Pro does not resell lookups. Keep costs down by setting a minimum character threshold, limiting countries, and avoiding autocomplete on billing unless you need it.
Can I use different providers for autocomplete and validation?
Yes. That split is intentional. Mapbox autocomplete with Loqate or Smarty validation is a normal production mix.
Help the customer enter the address once, correctly
WooCommerce will accept any address that fills the required fields. Autocomplete makes the complete, consistent address the path of least resistance: the customer types a street, picks a match, and city, postcode, and country fill in together.
Add validation when you need to check that address before you take payment. Add rules when your carriers cannot serve PO boxes, lockers, or streets with no house number.
Learn more about Address Guard Pro, or start with the setup guide: Get Started.