If you’re running a WooCommerce store, offering flexible payment options can be a game-changer for your customers. The WooCommerce Custom Payment Gateway Pro plugin is the ultimate solution for creating and managing custom payment gateways tailored to your business needs.
In this guide, we’ll walk you through the step-by-step process of installing, configuring, and optimizing the plugin for your WooCommerce store.
Why Use WooCommerce Custom Payment Gateway Pro?
This plugin allows you to:
- Create Custom Payment Gateways: Tailor payment options to fit unique business models.
- Customize Payment Instructions: Provide customers with clear guidance during checkout.
- Integrate Securely: Ensure a safe payment experience by leveraging WooCommerce standards.
- Multiple Input Fields: Include text fields, checkboxes, radio buttons, and more.
Installation
To get started, you’ll need to install the WooCommerce Custom Payment Gateway Pro plugin.
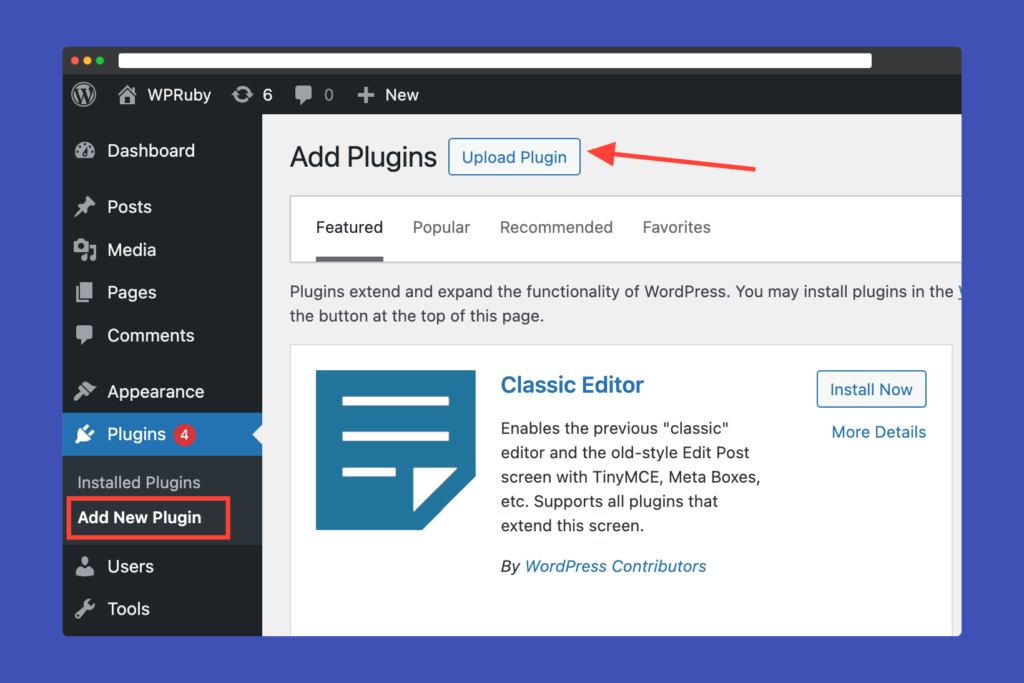
After purchasing the plugin, you can find the plugin files in your WPRuby account or the email receipt that was sent to you after the purchase. Next, you need to go to the WordPress admin area and visit Plugins » Add New page. After that, click on the ‘Upload Plugin’ button at the top of the page.
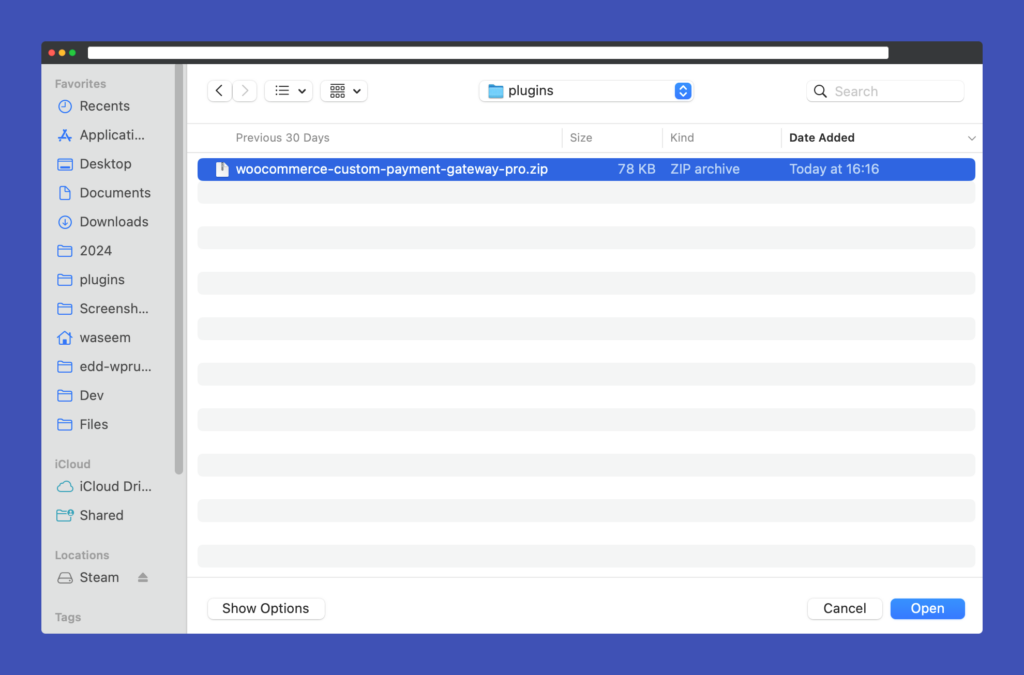
This will reveal the plugin upload form. Here you need to click on the ‘Choose File’ button and select the plugin file you downloaded earlier to your computer.
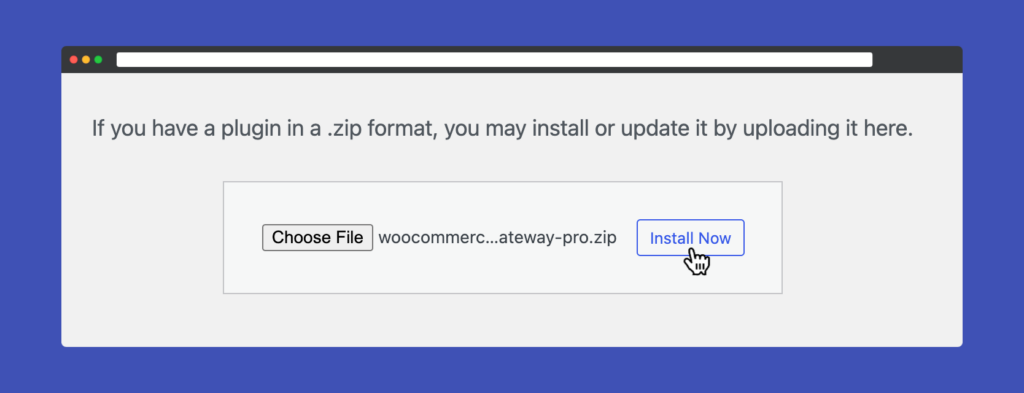
After you have selected the file, you need to click on the ‘Install Now’ button.
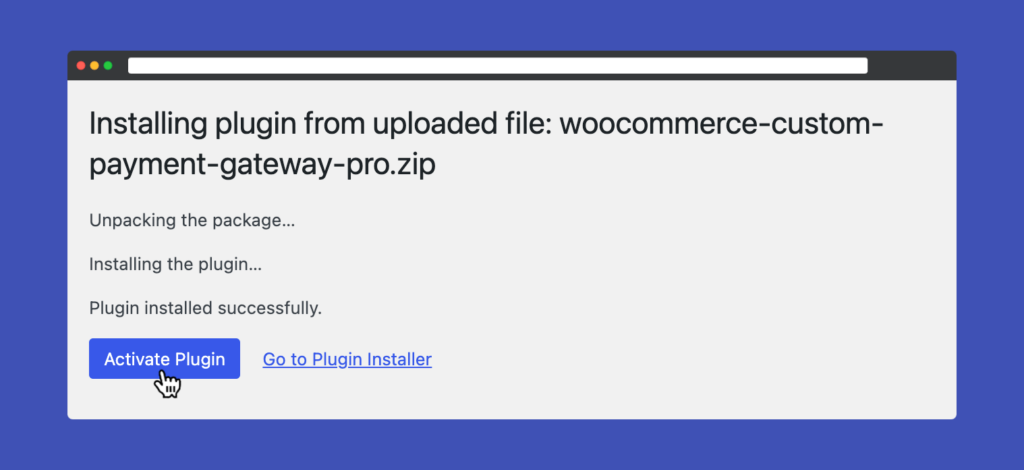
WordPress will proceed to transfer the plugin file from your computer and complete its installation. Upon successful installation, a confirmation message will be displayed. To begin utilizing the plugin, you must click the “Activate Plugin” button.
Now, the plugin is installed and ready to be configured.
Accessing the Plugin Settings
In the WordPress dashboard navigate to WooCommerce » Settings » Payments tab. Here, you’ll find various payment methods such as Check Payments and Cash on Delivery. To access the plugin settings page, click on the Manage button in the Custom Payment Pro row.
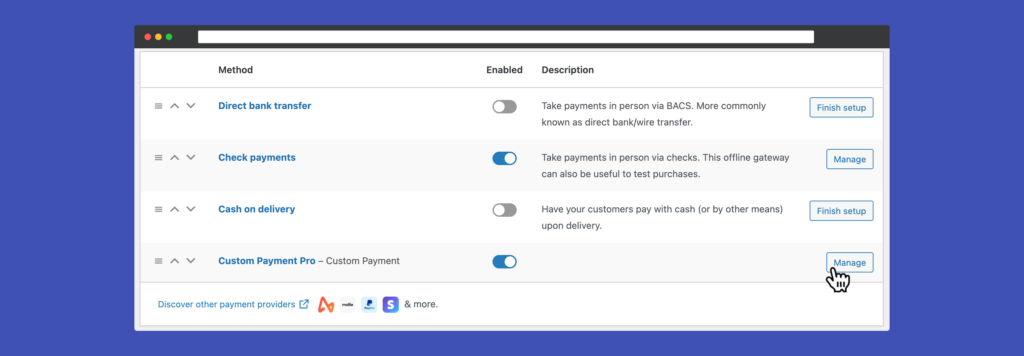
Step 3: Configuring Payment Settings in WooCommerce
The plugin now with its default settings will display the Custom Payment method on the Checkout page. Here is an overview of the plugin settings page:
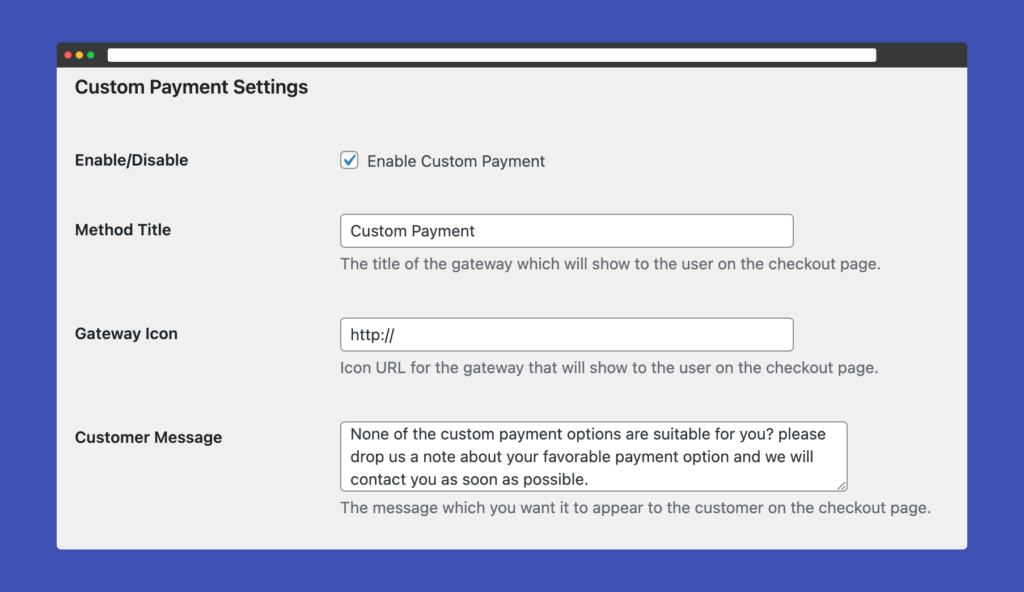
- Enable/Disable Choose whether to enable the payment gateway or not.
- Method Title Name the payment gateway. This will be visible to customers.
- Gateway Icon The icon URL for the gateway that will be shown to the user on the checkout page.
- Customer Message: The message you want to appear to the customer on the checkout page.
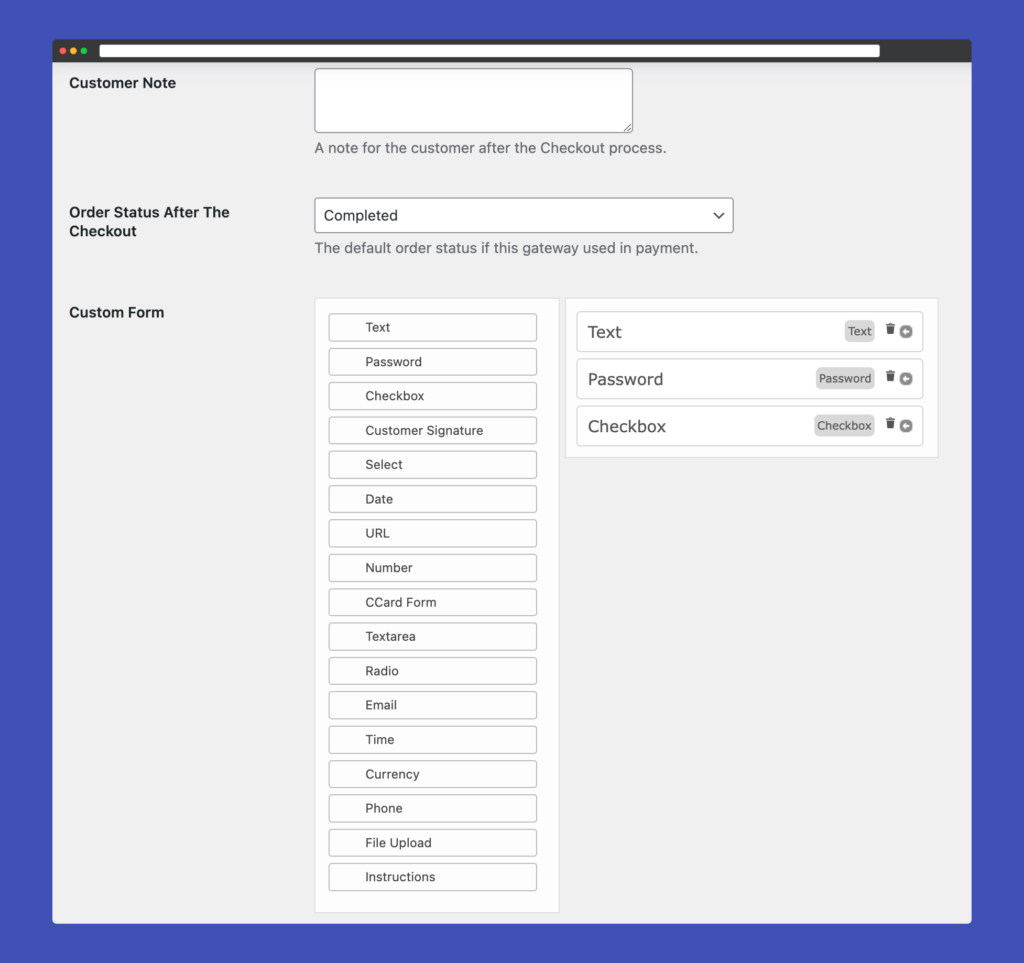
- Customer Note A note to the customer after the Checkout process.
- Order Status After The Checkout The default order status if this gateway is used in payment.
- Custom Form The checkout form builder where you can add multiple fields to the payment form at Checkout.
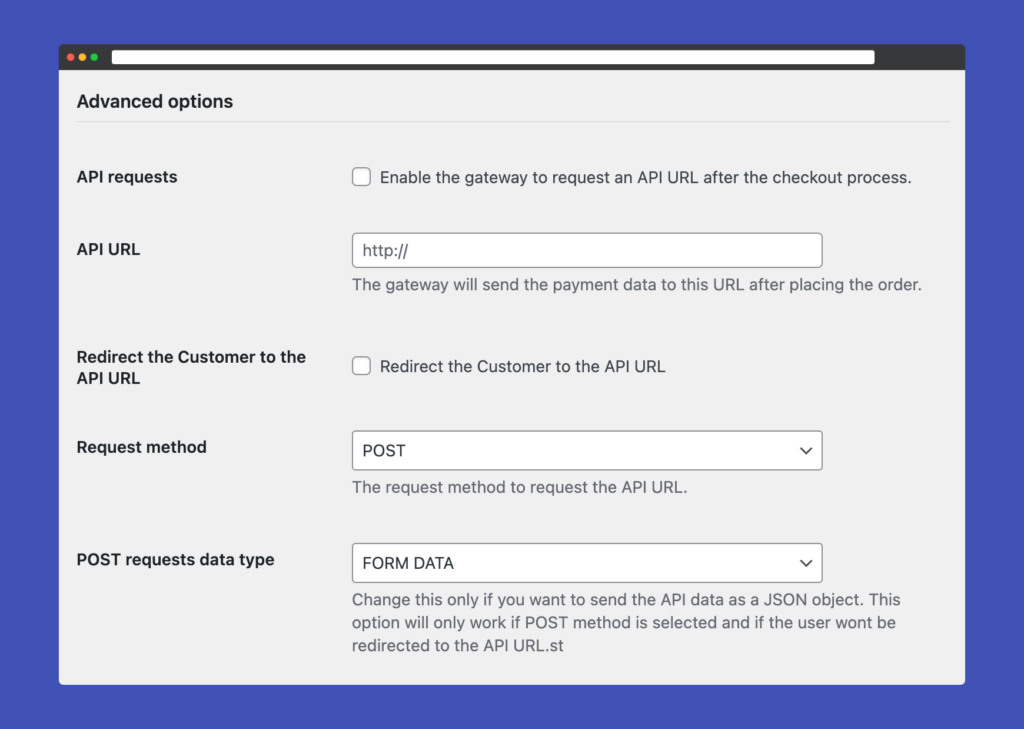
- API requests: Enable this option if you want the plugin to send the payment data to 3rd party API.
- Redirect the Customer to the API URL: If enabled, the customer will be redirected to the API URL. The API data will also be included with the redirect request.
- API URL: The gateway will send the payment data to this URL after placing the order.
- Request method: The request method to request the API URL.
- POST requests data type: Sometimes you might need to send the API data as a JSON object, this option will allow you to do that. This is only effective if you choose the Request method as POST.
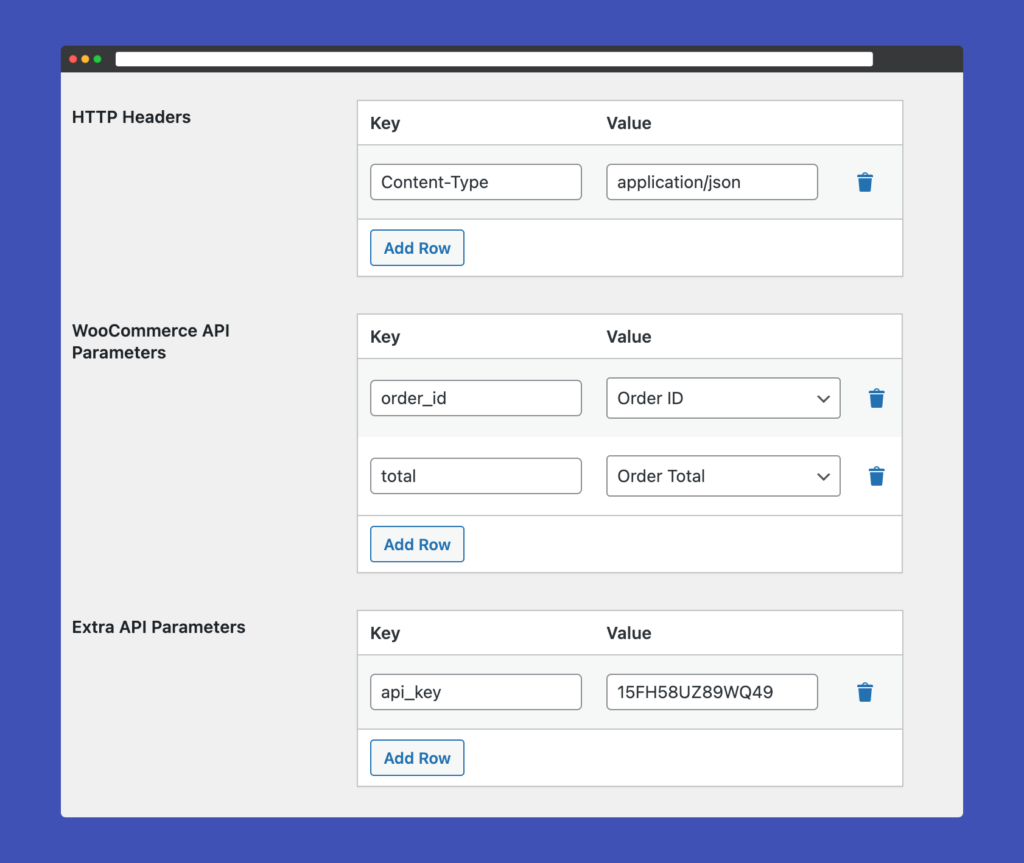
- HTTP Headers: This option will allow you to include any header information in the request. You can add as many keys/values as you require.
- WooCommerce API Parameters: Add the order API parameters you want here, such as order total, customer name, etc.
- Extra API Parameters: Add any extra API parameters you want here, such as API Keys or secret tokens … etc.
Using the Dynamic Form Builder
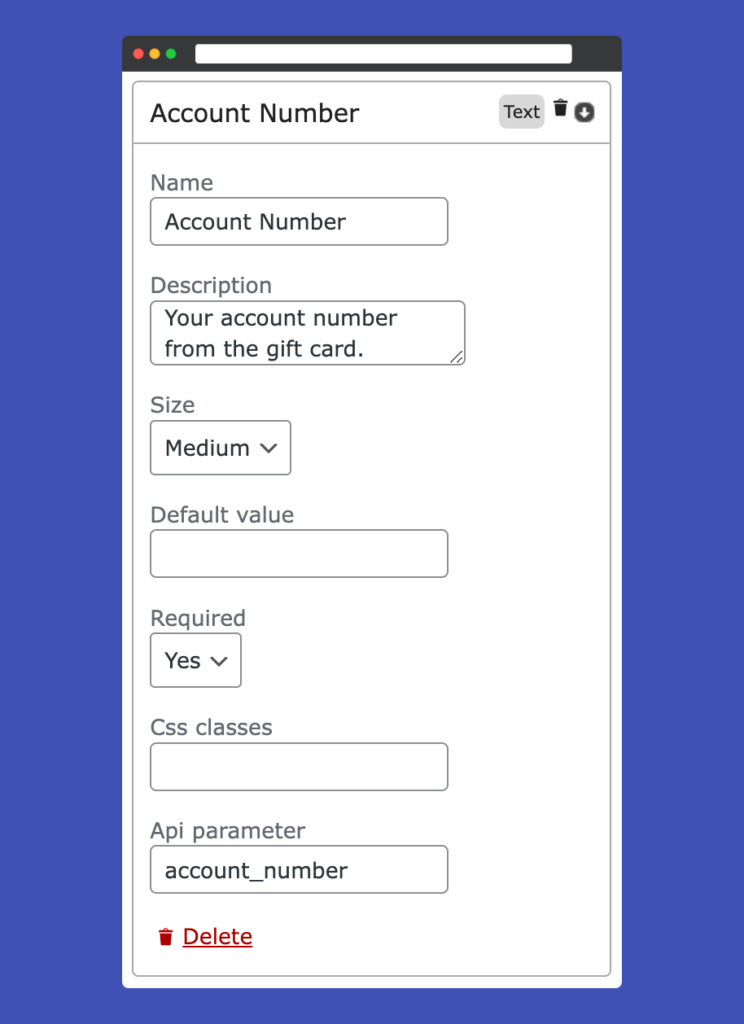
The WooCommerce Custom Payment Gateway Pro plugin includes a powerful and user-friendly Form Builder that allows you to collect additional information from customers during checkout. This feature ensures you can create tailored payment experiences by including custom fields in your payment gateways.
Adding a Custom Field
- Navigate to the Form Builder section of your payment gateway settings.
- Click the Add Field button to create a new field.
- Customize the field settings:
- Name: Enter a label for the field (e.g., “Account Number”).
- Description: Provide instructions or details for the customer (e.g., “Your account number from the gift card.”).
- Size: Choose the size of the field (e.g., Small, Medium, Large) to control how it appears in the form.
- Default Value: Add a predefined value, if needed.
- Required: Select whether the field is mandatory for completing the checkout process.
- CSS Classes: Add custom CSS classes to style the field according to your theme.
- API Parameter: Define an API parameter name if the data needs to be sent to an external API.
Managing Fields
- Rearrange fields by dragging and dropping them in the desired order.
- Delete fields by clicking the Delete button for any unwanted entries.
- Preview the form to ensure it aligns with your desired layout and functionality.
Supported Field Types
The form builder supports various input types, including:
- Text fields
- Checkboxes
- Radio buttons
- File uploads
- Signature fields
Benefits of the Form Builder
- Flexibility: Collect any additional information specific to your payment process.
- Customization: Match the design of the fields with your site’s branding.
- Integration: Pass data to external APIs for advanced functionality, such as custom payment processing or customer management.
Example Use Cases
- For “Bank Transfer,” add a field for “Account Number.”
- For “Gift Cards,” include a field for “Redemption Code” and allow file uploads for proof of purchase.
The Form Builder ensures you have all the tools needed to create a seamless and highly customized payment experience for your customers.
WooCommerce API Parameters
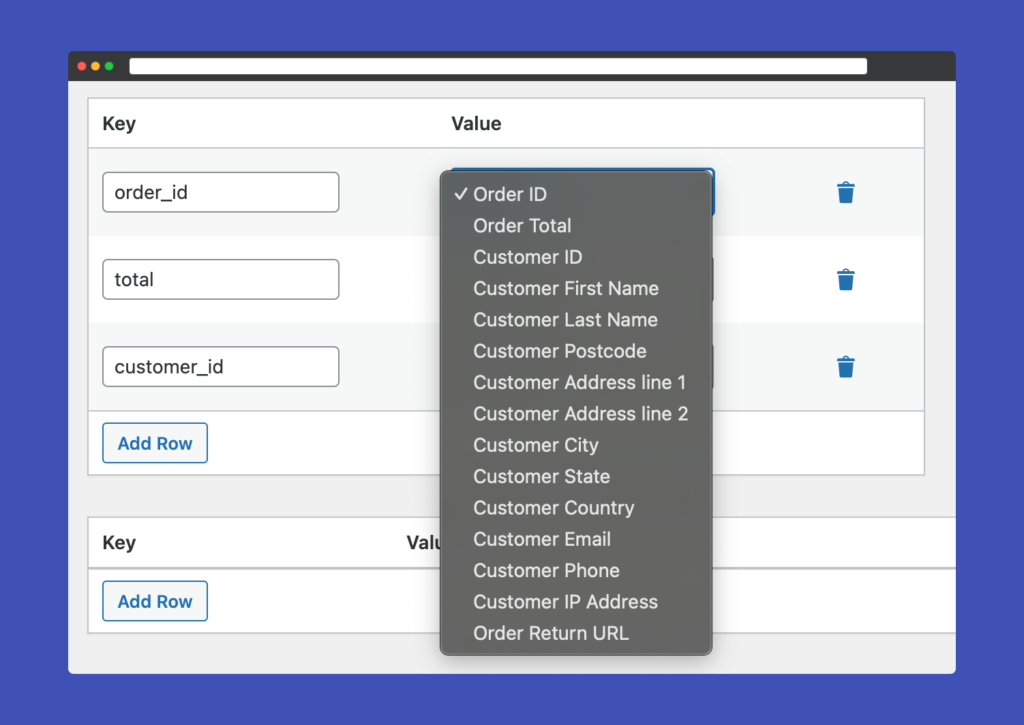
The plugin was originally designed to collect payment data from customers for offline processing. However, many of our users utilize the API Request feature to integrate WooCommerce with third-party payment gateways. It’s important to note that the plugin is not advertised as an out-of-the-box solution for integrating with any third-party payment gateway. To enhance its flexibility, we’ve added features that make connecting to APIs easier and more customizable.
The WooCommerce API parameters are straightforward. Each parameter in the request consists of a key and a value. For example, if you include the “Order Total,” you can assign it a key like total_amount. The plugin will automatically pair this key with the corresponding value. For instance, total_amount => 35.5. This approach applies to all other values you choose to include in the API request.
Additionally, we’ve introduced a WordPress filter that allows you to add custom API parameters as needed, giving you even greater control over your integration setup.
<?php

add_filter('custom_payment_gateways_api_data', 'add_more_parameters', 10, 2);

function add_more_parameters($wc_parameters, $order_id){

  $wc_parameters['checksum'] = md5($order_id);

  // you can modify/add more parameters but always return the $wc_parameters
  return $wc_parameters;
}
Return URL
To redirect users back to your website and update the order status (either as complete or failed), you need to provide the return URL to your payment provider’s API. Since each payment provider uses different keys for parameters, it’s essential to consult your payment provider’s API documentation for the correct configuration.
In the Success or Failure URL field under the Extra API Parameters option, the key should match the one specified in your payment provider’s documentation. The value should look something like this:
https://yourdomain.com/?wc-api=wc_custom_payment_gateway
To handle incoming requests from your payment gateway, use the custom_payment_process_returned_result action hook. Below is an example of how to process failed notifications. You can adjust the code as needed based on your payment gateway’s API documentation:
<?php

add_action('custom_payment_process_returned_result', function($request) {
    // Example: Handling a failed payment notification
    if (isset($request['payment_status']) && $request['payment_status'] === 'failed') {
        $order_id = $request['order_id']; // Replace with your parameter for the order ID
        $order = wc_get_order($order_id);
        if ($order) {
            $order->update_status('failed', 'Payment failed via custom gateway');
        }
    }
});
Hooks usage examples
The plugin offers multiple WordPress hooks to provide maximum flexibility for developers. These hooks allow you to customize various aspects of the plugin, such as validating custom fields, modifying API request parameters, or adding additional functionality tailored to your business needs. By leveraging these hooks, you can easily integrate with third-party services, implement custom business logic, and extend the plugin’s capabilities without modifying its core code. This approach ensures a highly adaptable and developer-friendly solution for creating custom payment gateways.
Custom Validation
The custom_payment_gateways_validate_field hook is a powerful and flexible tool provided by the plugin that allows developers to implement custom validation logic for fields created using the plugin’s Form Builder. This hook is particularly useful because it ensures that data entered by customers during checkout adheres to specific business rules or requirements.
For example, if a field like “Account Number” requires exactly 8 digits or a particular format, this hook enables you to define and enforce such constraints dynamically. By leveraging this hook, you can prevent invalid or incomplete data from being submitted, reducing potential errors during payment processing and improving the overall checkout experience for customers.
<?php
add_filter('custom_payment_gateways_validate_field', 'validate_account_number', 10, 3);

function validate_account_number($is_valid, $field_name, $value) {
    if($field_name === 'Account Number') {
        if(strlen($value) !== 8) {
            return "Account Number must be 8 digits";
        }
}
Customizing API Request Parameters
The custom_payment_gateways_api_data hook is an essential feature of the plugin that allows developers to customize the data sent to third-party APIs during the checkout process. This hook is useful when integrating your WooCommerce store with external payment gateways or APIs that require additional parameters or specific data formats.
For instance, in the provided example, the hook is used to add an authorization parameter containing a hashed token (md5(‘Your Token’)) to the API request body. This can be critical for meeting authentication requirements or ensuring secure communication with the external service. By leveraging this hook, developers can dynamically modify or extend the API data, enabling seamless integrations with a wide variety of third-party systems and providing greater flexibility for advanced use cases.
<?php

add_filter('custom_payment_gateways_api_data', 'add_bearer_token_to_body_parameters', 10, 2);

function add_bearer_token_to_body_parameters($wc_parameters, $order_id)
{
	$wc_parameters['authorization'] = md5('Your Token');

	return $wc_parameters;

}
Multiple Gateways
Multiple custom payment gateways can be created and managed using the WooCommerce Custom Payment Gateway Pro plugin, allowing tailored payment options to be offered to customers. Each gateway can be set up with specific settings, instructions, and fields. This ensures that diverse payment preferences are accommodated while a seamless checkout experience is maintained.
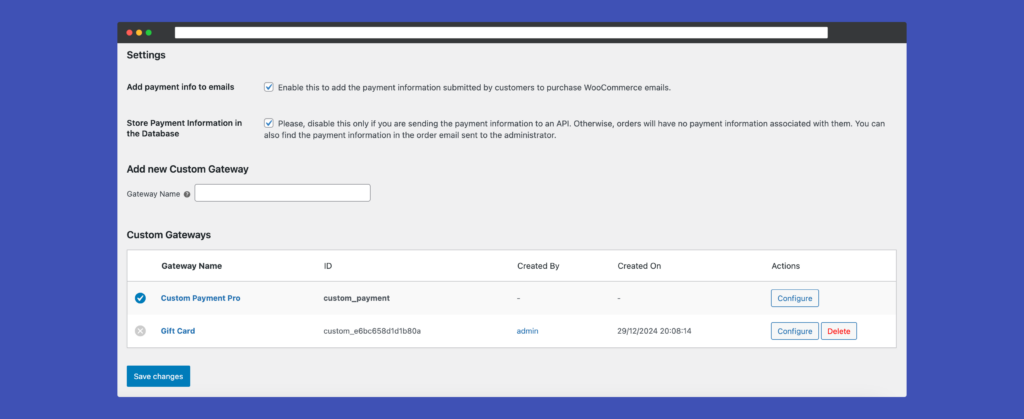
To add more gateways, go to WooCommerce ⇒ Settings ⇒ Custom Payment Gateways. Fill in the new Gateway name in the “Gateway Name” field, and then click on the “Save Changes” button. The new gateway will appear in the Custom Gateways table, then you can configure it or delete it from the Actions column of the table.
Conclusion
With the WooCommerce Custom Payment Gateway Pro, you have complete control over your payment options. By following this guide, you can easily configure and manage custom gateways to enhance your store’s payment flexibility and improve customer satisfaction.
If you encounter any issues or need advanced customizations, feel free to check out the documentation or contact the support team.
